
Check out our video “Deploying NexentaStor as a Virtual Storage Appliance“.
Today’s modern datacenter has a combination of compute, storage and networking options. This includes an ever-growing use of hyperconverged and block only storage systems. These systems are great for running virtual machines, but users and applications still require file services to conduct daily business. Deploying a file services solution for NFS or SMB connections can be a labor intensive and expensive proposition; to combat that, Nexenta provides a quick and easy way for administrators to add file services to their existing virtual infrastructure. One of the many deployment models of the NexentaStor solution is as a virtual storage appliance (VSA). To make this even simpler and faster for our end users, we have packaged NexentaStor as an OVF appliance. The NexentaStor OVF is installed directly from a single URL for the OVF:
https://prodpkg.nexenta.com/nstor/5.2.1.8/addons/NexentaStorVSA.ovf
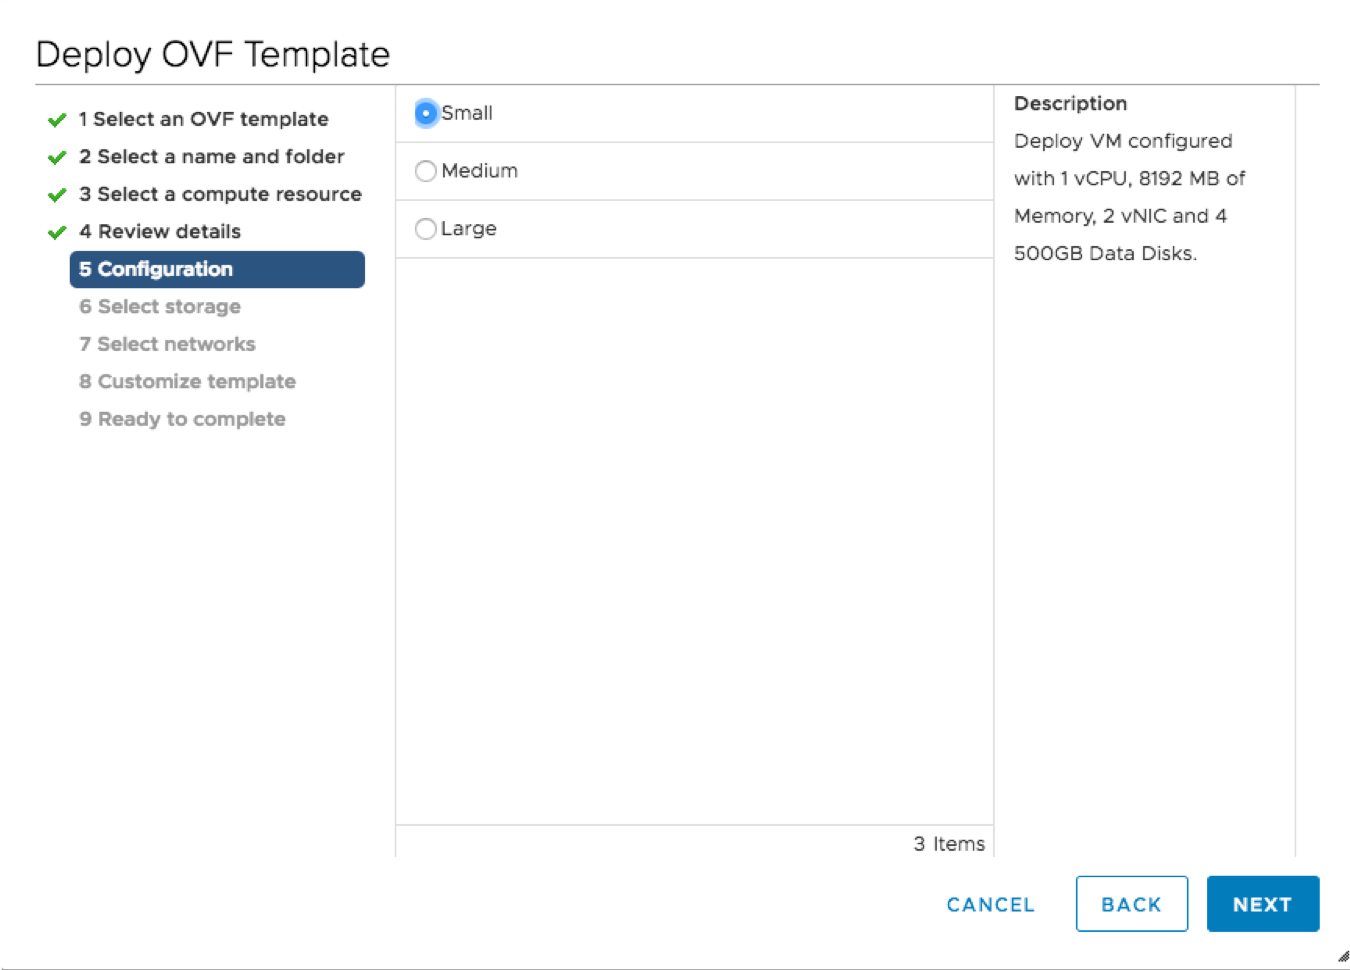
To deploy the NexentaStor Virtual Storage Appliance you simply choose Deploy OVF from the vCenter interface and enter the url. To simplify the solution even more we have customized the OVF to provide you with a best practice configuration for three different VSA builds.
- Small – Proof of Concept and Initial Deployments, Initial Config: 4TB
- Medium – Branch Office File Services, Initial Config 16TB
- Large – Enterprise File, Initial Config 32TB, add more VMDK as you see fit
Each of these will select the correct CPU and Memory, add 2 network interfaces for management and data and add the disks needed to create the first pool for file services.
If you already know how to deploy an OVF template skip to the post deployment configuration
OVF Deployment
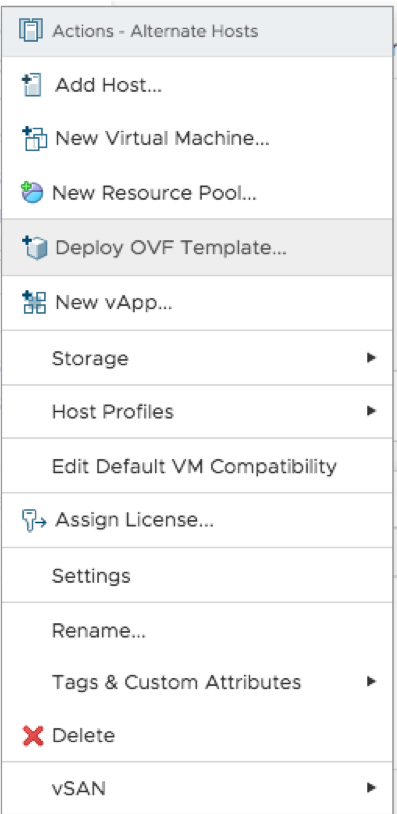
- Right Click on your Cluster and “Deploy OVF Template”
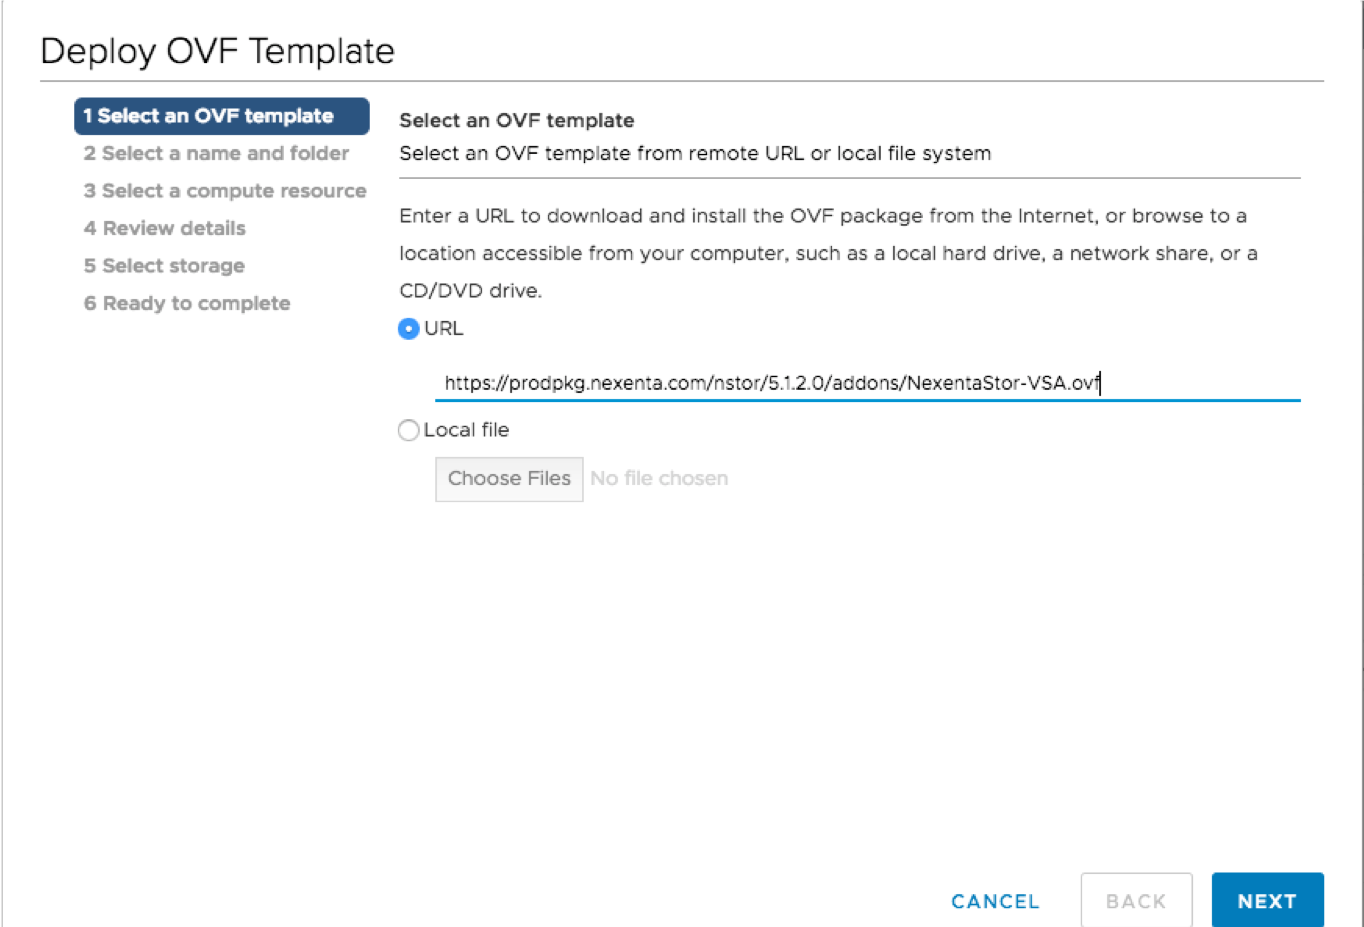
- Enter the url https://prodpkg.nexenta.com/nstor/5.1.2.0/addons/NexentaStor-VSA.ovf
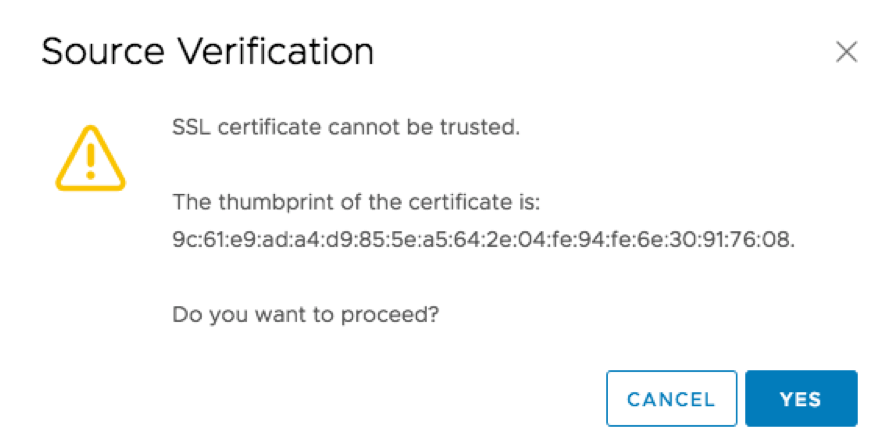
- Trust the certificate
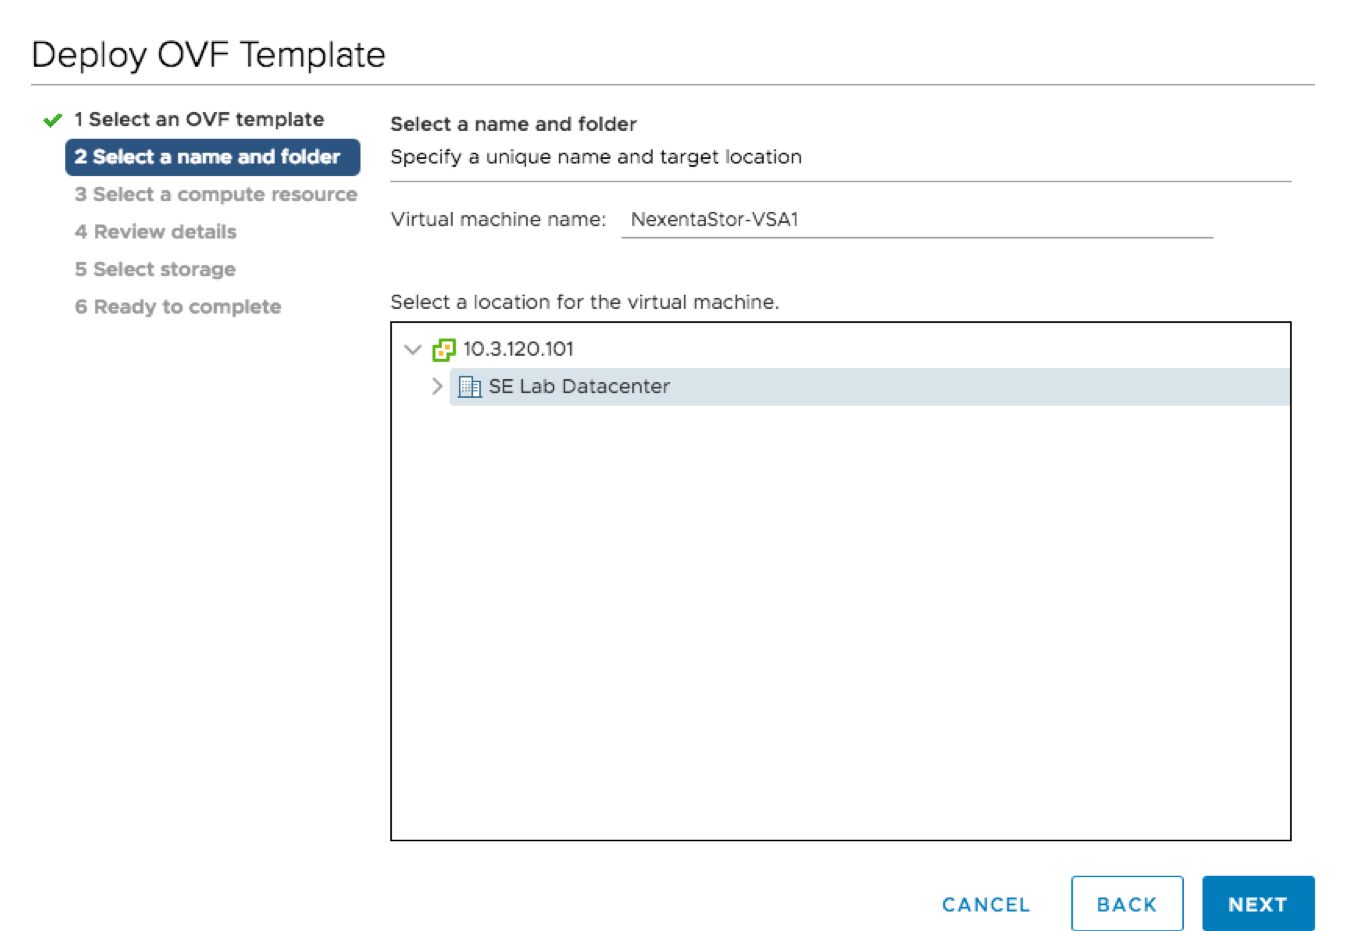
- Select your name and folder
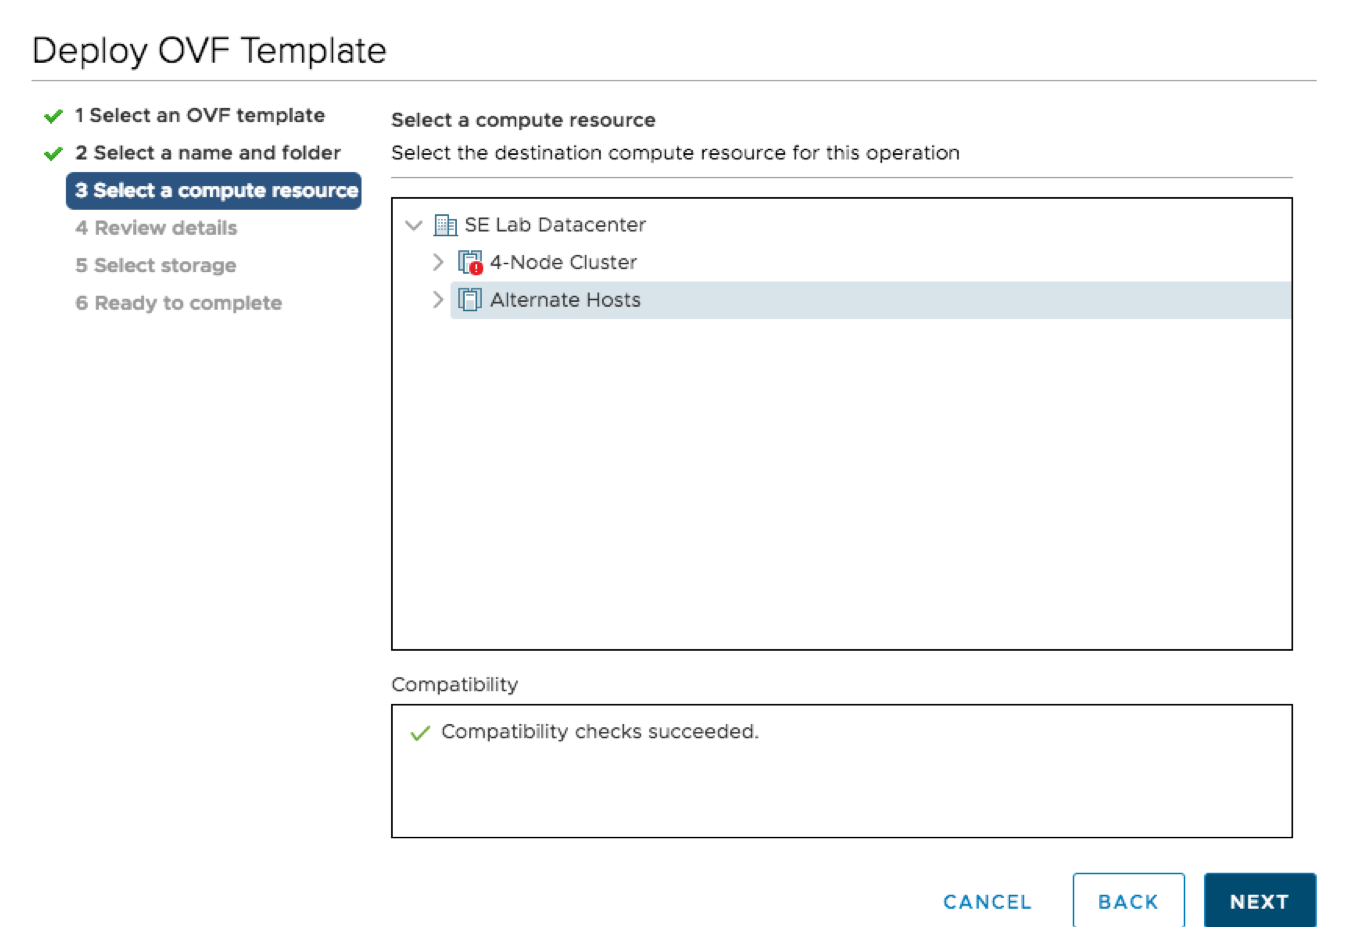
- Select your compute resource
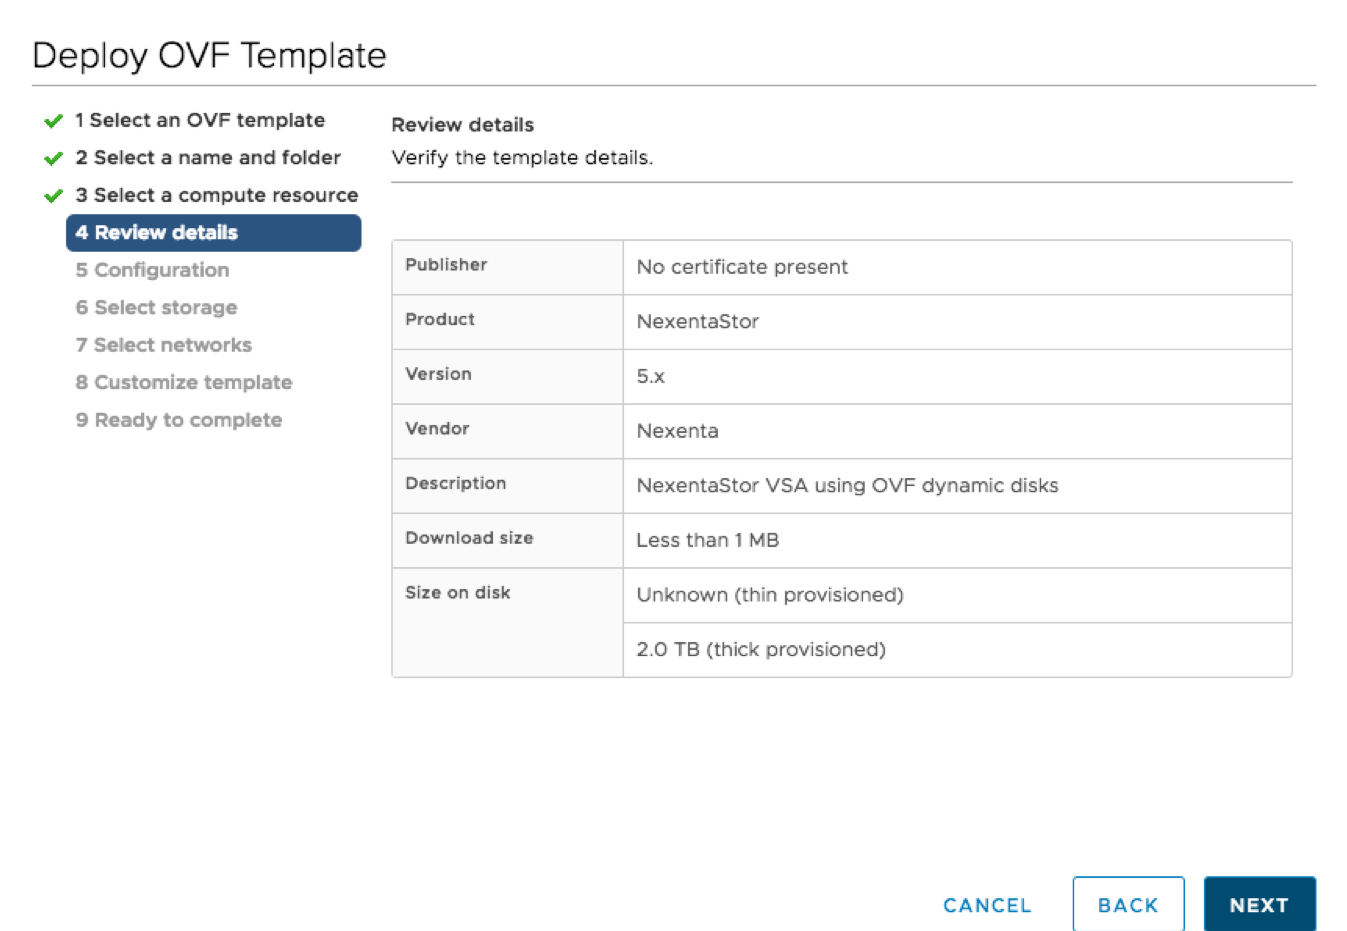
- Confirm the details
- Select the size VSA you would like to deploy. All the virtual hardware options can be edited after deployment if needed as well, including adding more drives
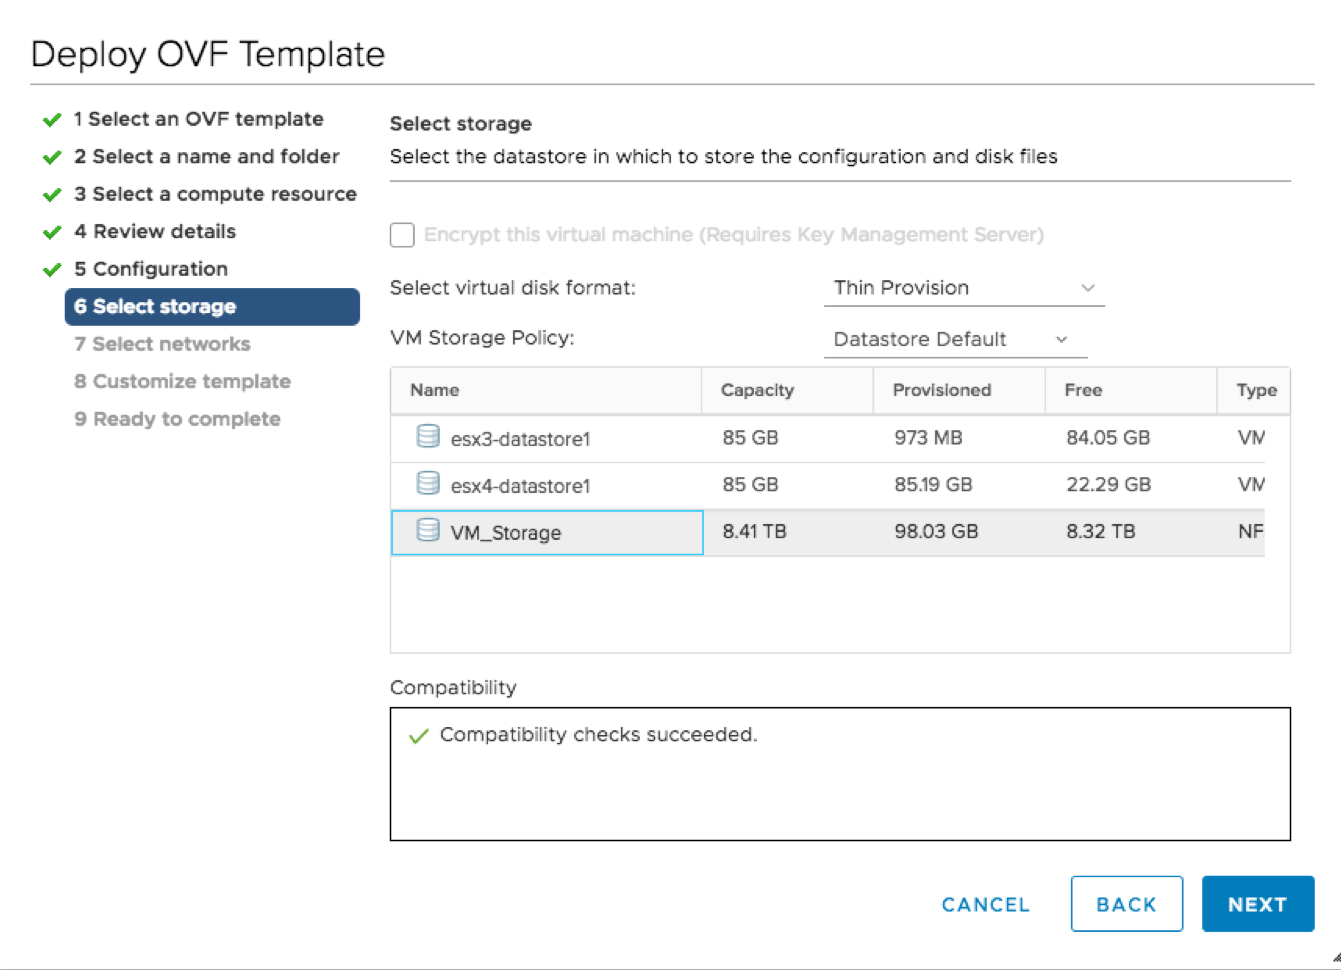
- Select where you would like your storage to be deployed
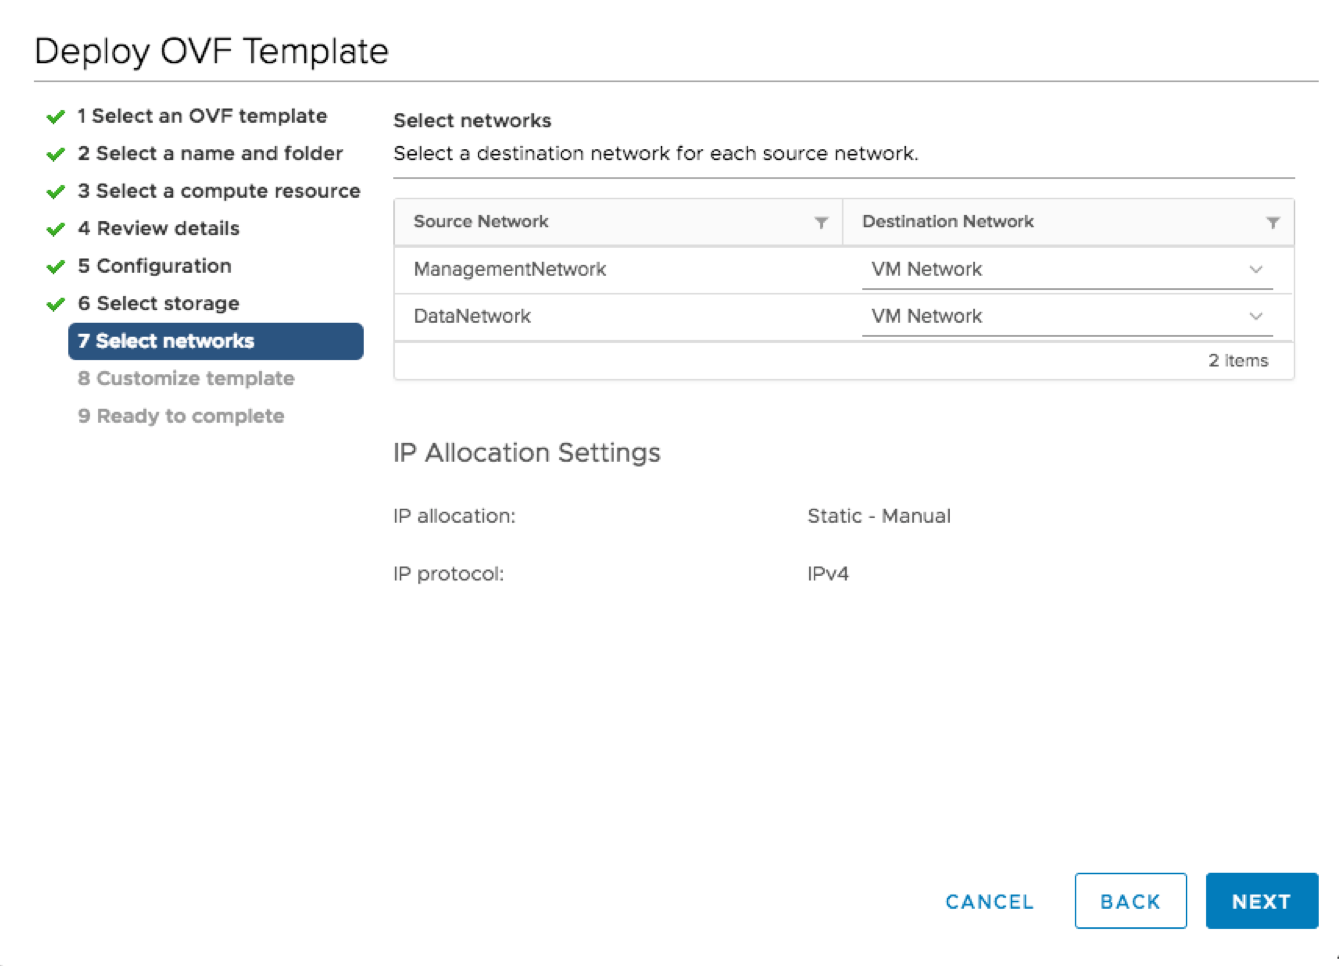
- Select the appropriate virtual networks. Best practice will be to use 2 different networks.
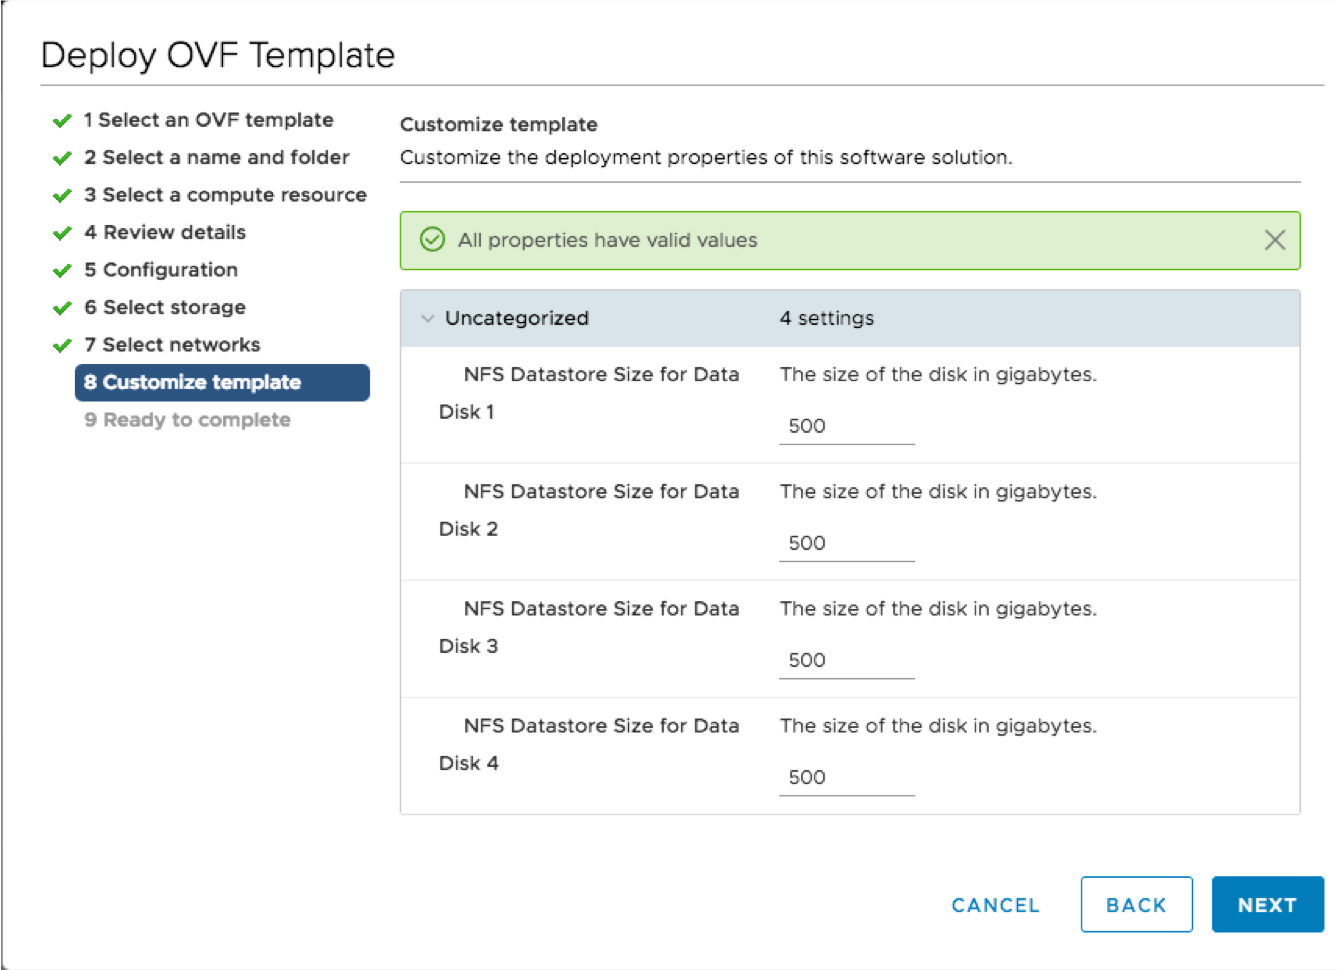
- Validate the size of your first 4 virtual disks, this is auto populated depending on the size of your VSA but you can change them now.
- Confirm all your options and you are all set to deploy your NexentaStor Virtual Storage Appliance

Post Deployment Configuration
Once you have deployed the OVF, power on and log into the newly created VSA using the following credentials.
- Username : admin
- Password: Psswd1234 (You are definitely going to want to change that one)
Next run the following steps to reset the hostname, password and settings needed for your environment:
-
- Run the following command command to setup the appliance
-
system setup
-
- Activate your license – You can get a trial license at https://nexenta.com/downloads
-
license activate
-
- Create your pool – This will create a stripe pool names Pool1 using 4 drives. All these variables can be changed.
-
pool create-auto stripe Pool1 -M 4
-
- The last step to give users access to the files is to create a filesystem and share it, this can be done through the CLI, through NexentaFusion or through the NexentaStor vCenter Plugin
- Run the following command command to setup the appliance
For more, check out our video “Deploying NexentaStor as a Virtual Storage Appliance“.